This festive season, bring home the solar panels to lighten and brighten up your home with an eco-friendly method. We are talking about the much-sought device – the solar panels, which is quite an easy and interesting way to celebrate the festivities. With just a few available stuff around, you can create your solar diyas and make everyone aw-struck. Gift your loved ones the self-made solar diyas, and rock the festival with even more enthusiasm and love.
Why choose solar diyas?
There are so many reasons to go for a solar diya during festivities. Below mentioned are the reasons to know why solar diyas are so beneficial.
- They are eco-friendly, and thus they don’t cause any harm to the environment. It saves considerable consumption of oil as well.
- It saves on power. The solar diyas charge by taking the sun’s solar energy, thus involving no power to lighten up the electrical devices.
- Less power consumption means fewer electricity bills. Thus, you don’t have to worry about the electricity bill during the festivals like Diwali.
- The solar panels or devices are very set-up and easy to install as well. It has no fear of use and is safe for kids as well.
- Unlike the oil-based wicks used in diyas traditionally, the solar-based diyas or lanterns will not require these and will glow for around 5 to 6 hours at a continuous stretch. Thus, you can sit back and relax once your diya starts glowing.
Moving further, we will now learn how to make very efficient solar diyas for our festivals. It is not only easy but quite fun to make.
How to make solar diyas?
Before we move on to the procedure, we should know what things will be required to make the diyas.
Things required –
- Diya
- Yellow LEDs
- Jumper cables
- Scissor
- The solar panel (mini)
- Hot glue
- Li-battery
Arrange for these things, and you are good to go. Make sure the parts you use are of good quality. The best part of this diya is that it is sourced from a renewable form of energy and can be used for a very long time. Once you are done arranging these things, it’s time for us to put them together. Let us know how!
Read about: What is a Solar Jugnu?
How to Proceed?
Source: Open Green Energy
- Firstly take the solar panel and put it under the sun for some time so that it charges very well for about 3 hours. Charging for around this time is enough to keep the diya illuminated for 2 to 3 hours easily. If you want it to glow for more time, charge accordingly.
- The solar panel should have a lithium battery attached, with proper wiring for the LED to be fixed. You can use a switchboard if you don’t have a jumper cable.
- Attempt to gather items from a well-known brand. It will ensure that the quality, service, and warranty are all up to par. one can rely on the goods to last a long time. Don’t ever put the product’s quality at risk. It is critical to choose high-quality products at reasonable pricing.
- Connectivity is the most important aspect of building a solar lamp from the ground up. A single blunder can result in the gadgets and parts of the light being destroyed.
- Choose the wire and make sure it’s the right length. Note that the wire will deliver electricity to the light, so make sure you don’t make any mistakes here. It would help if you clipped the wire to perfection before connecting it. You’ll be able to add the wire in the correct location if you trim it perfectly.
- You’ll need many pieces of equipment to create light. An electrical device’s circuit board is its beating heart. Circuit boards in solar lights maintain a link between the cable, battery, and light. It would help if you made a proper connection between the light and the circuit board.
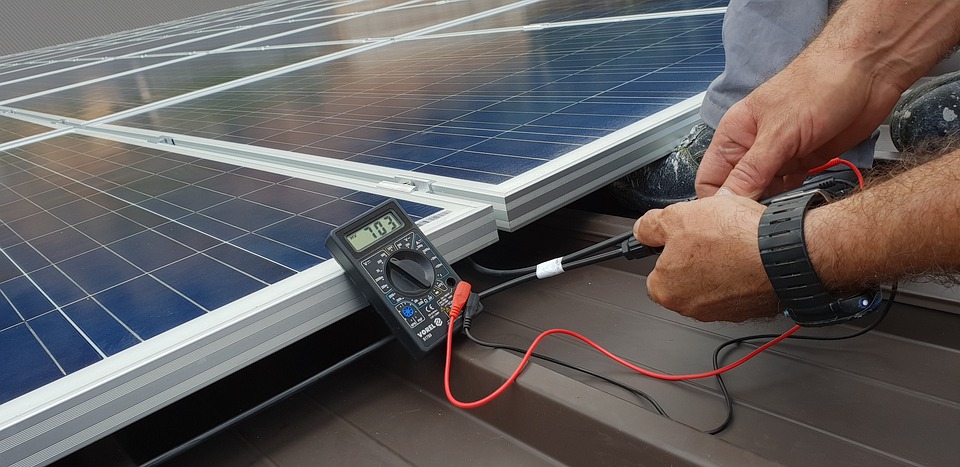
- The board will supply electricity to the light via the cable you’ve already inserted. Before you finish, check the voltage to make sure you’ve connected everything correctly.
- Check the connection ports and hubs as well to ensure secure functioning. When attaching the light to the circuit board, there is no compact connectivity. For long-term operation, all you need is a reliable and secure connection.
- You’ve already gathered all of the necessary components and installed them correctly. As a result, connect them and use long-lasting glue to secure all of the pieces.
- To firmly adhere to the elements, use super glue or hot glue. Apply adhesive to the solar panel side and firmly press the wires next to it to ensure that they are well connected. After the successful connection, we get a well-lighted solar diya.
- Now, choose an ideal location where you’ll keep your illuminated self-made (DIY) solar diyas.
After you’ve made your solar light, lantern, or lamp, the next step is to keep it in good working order. It is suggested that you change the solar batteries every three months to guarantee that your solar light lasts as long as possible. The next best thing to do is to clean the solar light.
Please ensure that the solar light is kept clean at all times, free of dust and grime. If you wish to use solar light in your living area, dirt can prohibit it from doing so. The stimulation will also shield the solar panel from direct sunlight, which is necessary for the solar light to function.
If you are looking to buy a solar panel or solar-based products, check out Waaree Group and their range of solar products. The company is the largest solar-based products manufacturer and distributor in the country. The company will offer various other services besides solar panels, such as solar generators, solar wires, panel stands, PV modules, and many more. Waaree Groups is a very trusted company and is a top player in India and a leading solar solution company globally. Therefore, check out the best quality solar-based products and solutions on Waaree Group. Call us up for any quality checks and solar plant instalments.
Further Read: The 5 Best Outdoor Solar Lights